Simple Off Camera Flash Setup for Weddings
The wedding day is the most important day of your clients’ lives. Couples deserve to have their photos and also those of their family and friends to look as amazing as possible. Wedding photographers have many responsibilities. One of the most important things to do is capturing an image that represents the story of the event. This article will teach you how to do an off camera flash setup for wedding photography and make you take beautiful shots that will leave your clients ecstatic!
Why use off camera flash techniques?
It is important to note that one of the most difficult aspects of shooting weddings is dealing with different locations and weather. Lighting conditions can be less than ideal, leading to tough choices in the camera setting for good results. Time pressure adds to the challenge. It is important not only to create pleasing shots but also to get them quickly before they’re gone forever!
The only thing that can make it better is for a wedding photographer to have an arsenal containing off camera flash setups. With that, you always have control over your light source no matter what type of shoot comes your way.
The equipment you need to use off camera flash
Camera
You can’t attempt off camera flash photography without a camera. This is basic knowledge that every aspiring photographer should know if they want to take quality photos. Any cheap but decent digital SLR will do, may it be a Nikon or a Canon camera.
Flash
You can light your scene with any off camera flash. If you have a tight budget, you could buy an old manual flash for under $20 or invest in speedlites which range from around $400 to over ten thousand dollars. You need something that fits your needs and price point.
There are two main ways to determine how many exposure settings should be used when using flash: TTL and manual. The advantage of the first is that your camera will automatically tell you what it needs. For the second one, the person makes all the adjusments – no automatic interface can do this for you. Both have pros and cons like photographing without having a photgraphy background, or setting up electronic equipment for it to work.
A specific example of a flash includes the 580exII flash with a pocket wizard to a fire flash or the Canon 600 EX-RT flash which has a built-in transmitter. The look of the photos is the same with either set-up.
Wireless Flash
Wireless triggering offers versatility and ease of using your camera’s flash off camera. The three methods that can be used for this are optical, infrared, or radiofrequency (RF) which each have their benefits.

Light Stand
Lightweight and quick to set up is extremely important to me. Note that if you are using larger modifiers, I use heavier light stands.
Here’s my wedding go to

and my heavier ones for commercial and portrait work

Umbrella Bracket
It’s worth investing in this straight away because cheaper options don’t last long. It makes your lighting equipment useless after just one use! Don’t even bother with the $10. The MagShoe is my all-time favorite accessory because it’s well built and easy to adjust.

Flash Modifiers
There are different flash modifiers out on the market but when starting, umbrellas are an excellent, inexpensive way to modify your style. They’re cheerful and versatile so you can use them in a variety of ways depending on the type of look that you want to create.
I like this one because it’s got a black cover in the case you want to bounce, and then if you take it off, you can shoot-through it with the translucent side!

This starter modifier kit is what I recommend to everyone!

Batteries for Flash and Trigger
Of course, you always need to have an extra pack of batteries just in case.
Wedding Off Camera Flash Setup
Remember that off-camera flash photography is a universal skill. For most wedding days, you can use natural light to photograph just about anything. However, there are many times when adding a source of lighting becomes necessary and it’s always useful outdoors after the sun sets or in indoor spaces like rooms or churches with no windows.
There are a lot of ways to set up for off camera flash photography. To build a basic setup, have one flash mounted on the camera, and one on a light stand. There are different ways to coordinate flashes depending on what type of flash you use. When using off camera flash with the 600 EX-RT system, you can have a flash mounted on your camera because it is used to trigger the other flash at a distance. You can also turn off the flash on top of your camera to prevent it from firing any light if you only want to use the off-camera light.
You can place your flashes closer, or farther back from the subject in a way that best suits each photo’s needs and style without getting tangled up with wires.
Off-camera flash allows photographers more flexibility because they are free from attaching these lights onto their cameras themselves–they only need an attachment for remote control (either hardwired or wireless) connection between them and their external strobe units which lighten practically any type of scene imaginable thanks to this independence!
Lighting Positions
Surveying the venue and determining background is one of the most important steps before photographing in an off-camera flash. It doesn’t matter if you are using a studio or taking pictures on location, it is crucial to know where your subject will be standing in the room so that you can position light properly with appropriate angles.
The key factor for this type of photography style is exposure; You don’t have to keep on adjusting your camera setting. Your on-camera bounce card will provide some extra light, and the main light source is your OCF. You’re going to place it 45 degrees from you so that it shines onto your couple!
Camera Settings
To get the perfect shots, it is always important to be mindful of the camera setting. The camera flash power should not be too strong or else the subjects can’t still be seen well; if you adjust your settings and try to fix the over-exposure issue by changing any one factor such as ISO or shutter speed then other factors will have an impact on how dark your background becomes because they are all interconnected.
Do a lower flash power (1/64 is a good place to start) and higher ISO! This will allow the subjects’ faces to be more visible, but not too bright. The background glow will also show up much better with this kind of setup as well. You shouldn’t shoot above 2.8 aperture when doing these kinds of shoots for your photos not to have dark spots around them – so make sure you take several shots at different levels if necessary!
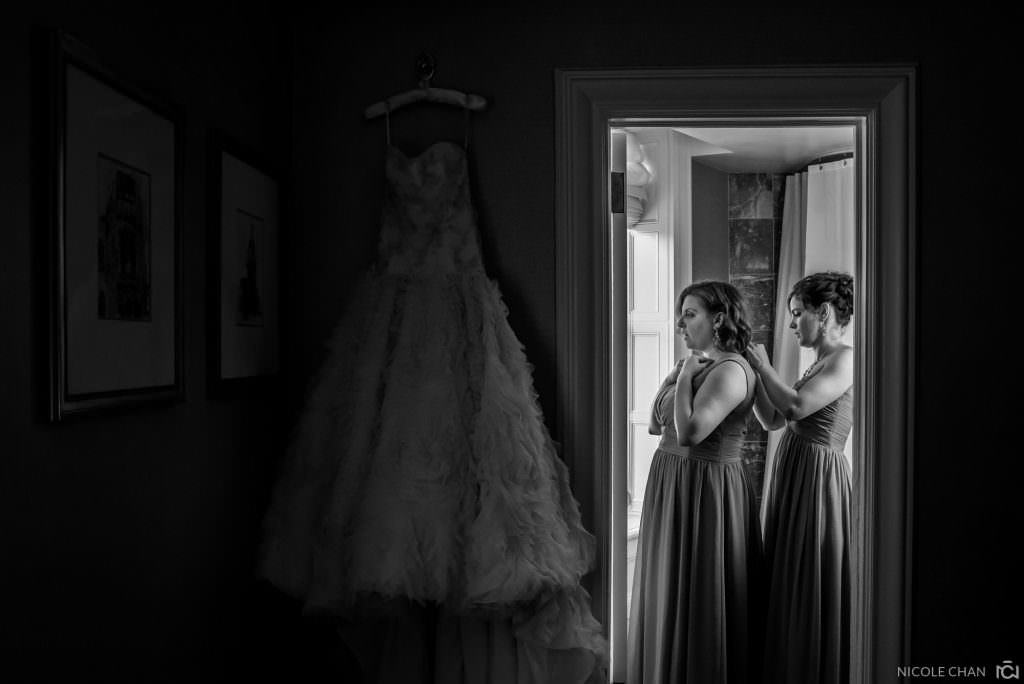
Off-camera flash setup for the getting ready room
Working with natural light is our preference, but we need to add an OCF if it’s not available. If you have a small window in your space and there aren’t any other options for light sources, use that as your backlight by having the client stand right up against it! We’ll set on flash power at a low level around 1200 ISO so they can get some nice glow from their skin and avoid hazy images with subjects having muddy skin tones. When you put up a flash, it will produce an image of your subjects having a much more balanced skin tone. You can also create natural-looking light sources with your flashes if there is nothing but overhead lights and no windows! Just be sure to turn off all ambient lighting and use the flash of your camera instead.
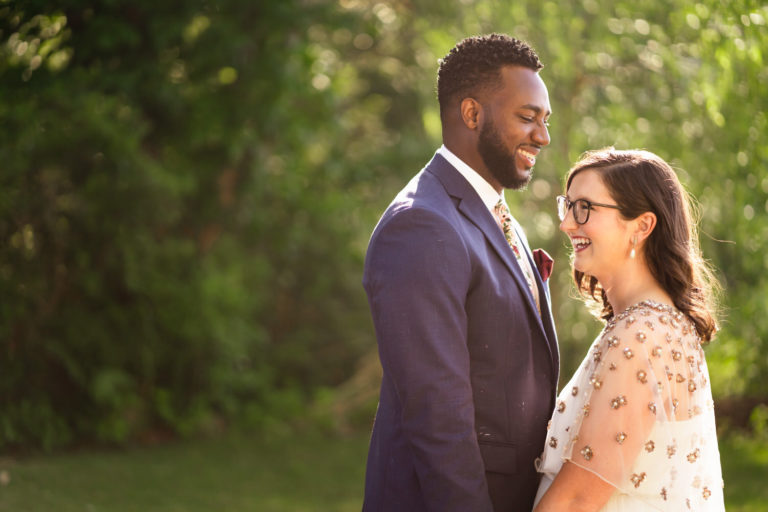
Camera flash for wedding portraits
The groom usually has to be a passive participant on the wedding day. He can’t show too much emotion, but he is still just as important in this vital ceremony that will make him happy for years to come. This setup involves one single flash and lowering ambient light so we don’t see anything else except what’s illuminated by it – which feels more real than any other type of photography could provide them with today
In a dark scene, make adjustments to the ISO, shutter speed, and aperture until you have reached what feels like an optimal level of darkness. Now turn on your off camera flash at a 45-degree angle close to the subject (the closer it is from them the lighter will be spread). Try to keep the most focus on his face but experiment with different angles!
To make sure you capture best angles and features, use a few different lighting patterns to give some variety in portraits with the same setup that you did for groom shots. For example, you can create dark portrait photos that have no crazy shadows on your subject’s face by following by reducing artificial light sources (if they are too bright) and adding directional or sidelights from one angle only without any fill flash
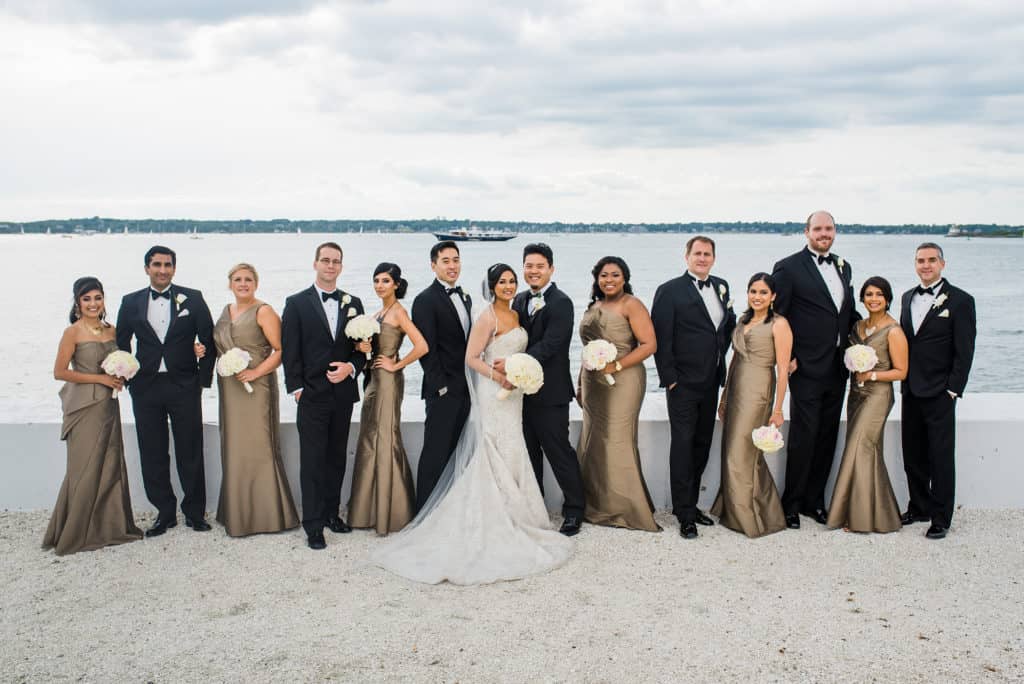
Off Camera flash setups for group photos
This includes photographing family and friends throughout the wedding. When shooting with only one flash, angle it at about 30 degrees. If you have two flashes, there are a few different setups to consider. Your first option is to put both of your lights on opposite 45 degree angles which will cover everything but can produce some strange shadows in the shot. The other setup just keeps one light at 45 degrees and brings the other closer to the camera while lowering its power- this way you’ll maximize softness without any weird spots or mismatched color temperatures (though if these qualities sound like what you’re looking for then try experimenting).
The last thing to consider for this off camera flash setup is whether you want the lighting on your subject even or harsh. If you’re in a room with high ceilings, a bounce flash will create more evenly lit subjects than a direct flash that has harsher shadows. But if the ceiling’s low and dark, bounce flashes won’t work without some supplemental light at ground level until it reaches into higher levels of ambient light
Off camera flash at the wedding reception
Photographing people on the dance floor can result in an amazing image. There are several ways to light a scene. One way is with two off-camera flashes, opposite each other. This creates moody effects and can create dark shadows if you’re not careful about where your subject’s face falls about the camera – be sure they have sufficient lighting! The flash on top of your camera can be helpful for some additional coverage when you need it but would often result in an inconsistent look that could overpower or wash out certain parts of the frame if you don’t test the angles properly. For most shots, put one light beside you; There can be times when moving around adds variety and dimensionality making those efforts worth it.
Make sure you have a secure plan for your lighting. It won’t be the first time someone has run into them and knocked it over while enjoying themselves on the dancefloor, so make sure to keep all of that in mind when planning out how they’re going to work with your setup.
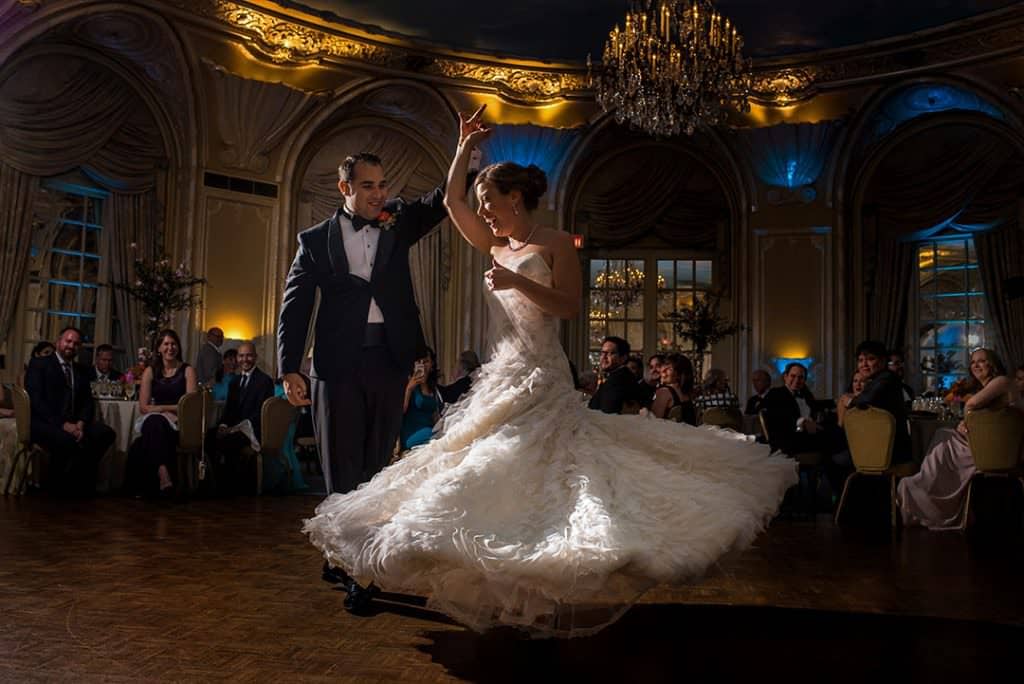
Off Camera flash setup for first dances
For the setup during the first dance, put a flash with an umbrella directly next to or on top of your DJ booth because you never want it in our shots. It’s out of place here and has less chance of being knocked over. The best position is standing right beside one side of the umbrella so that as the bride and groom are dancing they can rotate towards us without having to move around too much. This also means both flashes will be connected which will produce better lighting than if we only had one light source from just below their faces
Camera flash setups for cake cutting
For the cake cutting event, set up a camera flash at 45 degrees adjacent to the couple. This is your time to get creative! Photograph it from different positions to capture all of your favorite moments.
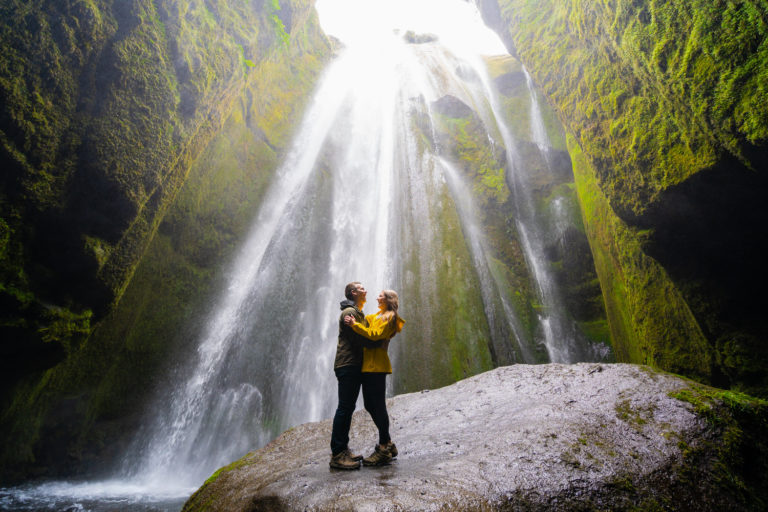
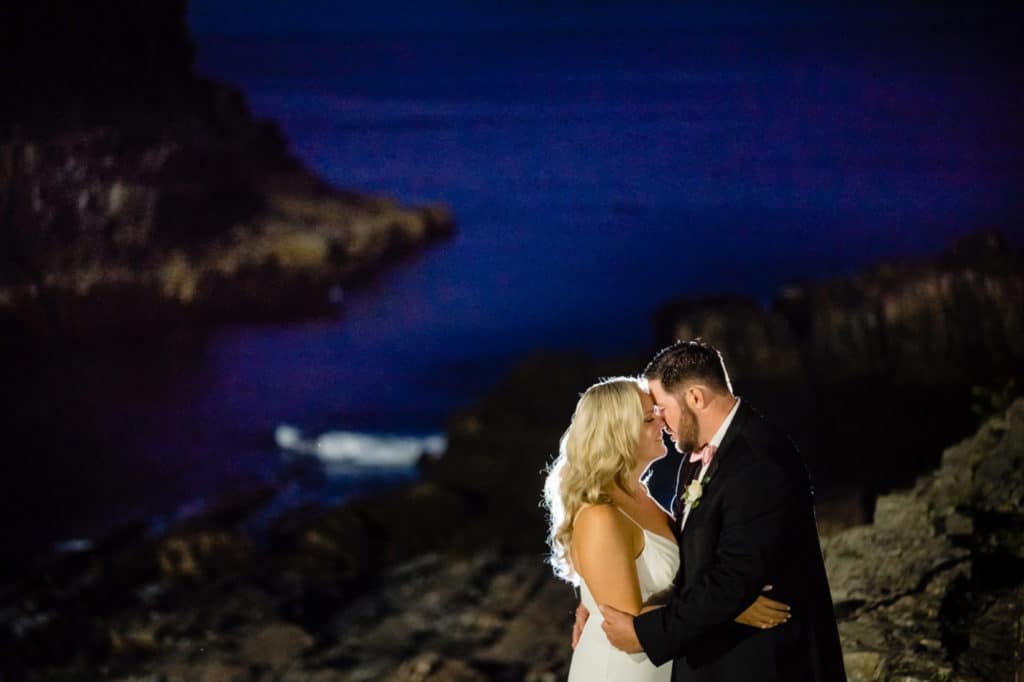
Off Camera flash setups at night
Shooting at night is rewarding and beautiful. One of the many ways to capture a stunning scene from your favorite wedding day in raw form is with an off-camera flash. One technique of shooting is with the off camera flash behind you, but on one side or in front of the couple; make sure not to get too close because it will light up their faces from this direction instead! For these purposes turn off any camera flash
To achieve amazing back-lit photos, it’s important to have your off camera flash completely hidden behind the couple (using their bodies to block it). Position them close enough together and strategically place some of their limbs so they will cover up any hint of light from the flash. This way if there is a bright flaring event in your lens photo then that would be gone since no one could see anything coming from its direction due to how well positioned everything was before taking this picture.
It’s important to keep the light stand relatively low. This will ensure that a good amount of detail is captured in the picture while also being able to see subjects’ facial expressions as well. A height about mid-way between their waist and chest level should be sufficient for most shots; however, you can experiment with different heights if desired!
There are so many factors that come into play, including light and composition. With a little creativity, you can achieve the effect of off camera flashes without spending too much money on equipment. However, there isn’t one standard formula for setting up your flash photography; it’s always about experimentation! If you have any other ideas or tricks to share with fellow photographers let us know in the comments below!
Full transparency
Some of these links. are affiliate links, which means that if you click on it and buy something, I get a small kickback! This money goes directly into my chocolates and mango snack fund for wedding days!
I write blogs to help my clients understand that I’m a nerd. I research and test my wedding photography equipment to extreme measures because I love what I do and I take my job super seriously.